I pray that 2012 will be a good one for us all.
As we leave 2011, I reflect on things that happened and realize we had a pretty quiet year. God is so good to us. Our grand babies are healthy. My husbands parents are still with us ( they have health problems but doing ok). I am getting some relief from the meds I am taking for my RA.
The best event was the birth of our new grandson on 11/11/11.
I do not usually write down my resolutions for the new year but here goes
- I will try to keep better track of receipts when I shop
- I will try to limit the amount of times I shop for fabric
this next one will be the hardest one to do.....
-I will add a new post to my blog at least once a week!
What is your New Years resolution?
Saturday, December 31, 2011


Sunday, December 25, 2011
Friday, December 16, 2011
Anniversary Roses!
40 beautiful roses, one for each year we have been married. 2 blue carnations , one for each of our precious sons!
Francis gives me one rose for each year. He adds one each year! He started this tradition on our first anniversary and the arrangement
gets bigger each year. Such a wonderful, thoughtful man. It is so great to be married to my best friend!

Francis gives me one rose for each year. He adds one each year! He started this tradition on our first anniversary and the arrangement
gets bigger each year. Such a wonderful, thoughtful man. It is so great to be married to my best friend!

Tuesday, December 13, 2011

Monday, November 28, 2011
thread and bobbins and knots oh my!
Ever wonder how to keep full and partially filled bobins from unwinding in a container? I think I have finally found a solution. I went to Sally's( a place where they sell beauty shop supplies) and I was looking for a good file for my nails. I noticed they sold these little thingies that they use when doing a pedicure. I immediately thought of the bobbin mess I had. I bought a couple to see if I could put filled and partially filled bobbins in them. These things work great.
Here are before and after photos of my bin for bobbins.

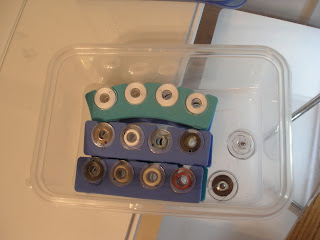
Here are before and after photos of my bin for bobbins.
before . . . . .

after . . . .

this is so much better!
Sunday, November 27, 2011
Sourdough bread!
I decided to try making a starter for sourdough bread. I found a recipe and tweaked it a little. Here it is:
Sourdough Bread
I make the starter in a quart jar (canning jar) . Cover with wax paper and put on the ring. Use a tooth pick and poke a few holes in the wax paper.
Starter:
In a quart jar: Mix 1 cup warm water, ½ cup sugar, 1 package (about 2 ¼ tsp) of dry yeast, and 3 level tablespoons of instant potato flakes. Stir with a wooden spoon. Cover it and put on the counter and let it ferment for 2 days. Then feed with starter feeder. Let it sit on counter over night and then refrigerate for 3- 5 days.
[ Starter feeder: 1 cup warm water, ½ cup sugar and 3 level tablespoons instant potato flakes.]
Every 4-5 days feed or make bread :
TO MAKE BREAD YOU WILL NEED:
6 cups bread flour
1 tablespoon salt
½ cup sugar
½ cup vegetable oil
1 cup starter
1 ¼ cup warm water (I usually add a little more water to make the dough softer –
2 tablespoons)
Combine all ingredients.
Knead on floured surface 5-10 minutes and place in a greased bowl. ( I put it in my oven with the oven light on) [ I use my mixer that has a dough hook. I knead it in there for only a couple of minutes until it all pulls away from the side of the bowl. Then I roll it a in a little flour on the counter before I put it to rise in the greased bowl.] Cover with a wet dishtowel and place in a warm spot for 12 hours.
Punch down and knead on floured surface and form into 3 loaves. Place in greased pans and put them in a warm spot and let them rise for about 6-8 hours. They will not rise a lot but when you bake them they rise a little more.
Bake at 350 degrees for 25-30 minutes.
After you remove a cup to make your bread, you must feed the remaining starter and let it sit on the counter 12 hours then put it in the refrigerator. Start process over.
IF YOU DO NOT WANT TO MAKE BREAD
Discard one cup of starter and feed the remaining starter then let it sit on the
counter 12 hours and refrigerate 3-5 days. If you don’t make bread, this is a good time to give a cup of starter to a friend, she then feeds her cup of starter , put it on her counter for 12 hours then refridgerate. In 3-5 days she can make bread etc.
To have bread for around lunch time, I start the bread making process around 5 pm the previous day so it can do the 12 hour rising and then the 6-8 hour rising.
We keep the bread in the fridge because it will mold quickly. We slice and toast it and it taste like you just took it out of the oven.
Friday, November 25, 2011
Sad looking feather stitching! I need some advice!
I have decided that it is time I learn to do feathers on my quilts.........so many of you talented quilters out there can do it so I figure I can maybe try to do it.
First I did some "Muscle Memory practice".
I also practice on a chalk board APP on my Ipad2. It gets easier to draw each time.


Then I sat at my sewing machine and tried to sew feathers...Ha Ha.....they were terrible but I did 5 tries. I dated the sample and hope to be able to look back once I can do this and see my progress.....I have to be able to do this. I am determined to get better at it.
in try #1 I drew the feather on with a pencil and tried to follow it....not so good!
the others were done free hand.

I can not believe I am posting this but I need to know if anyone had a difficult time learning how to do this. I have watched numerous Youtube videos and it does not look that hard to do ....then I tried it...NOT EASY at all...any suggestions out there on how I can improve? and yes I know the three Ps practice, practice, practice!!!!!
First I did some "Muscle Memory practice".
I also practice on a chalk board APP on my Ipad2. It gets easier to draw each time.


Then I sat at my sewing machine and tried to sew feathers...Ha Ha.....they were terrible but I did 5 tries. I dated the sample and hope to be able to look back once I can do this and see my progress.....I have to be able to do this. I am determined to get better at it.
in try #1 I drew the feather on with a pencil and tried to follow it....not so good!
the others were done free hand.

I can not believe I am posting this but I need to know if anyone had a difficult time learning how to do this. I have watched numerous Youtube videos and it does not look that hard to do ....then I tried it...NOT EASY at all...any suggestions out there on how I can improve? and yes I know the three Ps practice, practice, practice!!!!!
Thursday, November 24, 2011
Tuesday, November 15, 2011
to border or not to border.....that is the question
Please help me decide if and how I should do a border on this wall hanging. It measures a little over 45 inches square.
Here are some of the ideas I came up with:
no border...just leave the yellow strip


Please submit your ideas. I really do not know how I should finish this one!
thanks
Here are some of the ideas I came up with:
no border...just leave the yellow strip


a five inch border that matches the center of each plate:

a five inch border with some dresden blades on each corner?

thanks
Friday, November 11, 2011
My first try at Dresden plate pattern
I had this stack of 5" yellow squares in my fabric stash and decided to try a new pattern. I have always wanted to do a Dresden plate but thought it was too difficult to do!
Here are the stages of my project:
I selected 20 different squares then used a Dresden Plate ruler and cut out the blades. You can get 2 blades from each square so with 20 different ones, you can get 2 plates!


I sewed the ends of each one and pressed each one to make the points on the blades.


I placed them on my 15 inch ruler in an order I liked then sewed them together, made a center and sewed it onto the plate.


I plan to make 9 plates and make a wall hanging for my kitchen. These colors will match perfectly

Here are the stages of my project:
I selected 20 different squares then used a Dresden Plate ruler and cut out the blades. You can get 2 blades from each square so with 20 different ones, you can get 2 plates!


I sewed the ends of each one and pressed each one to make the points on the blades.


I placed them on my 15 inch ruler in an order I liked then sewed them together, made a center and sewed it onto the plate.

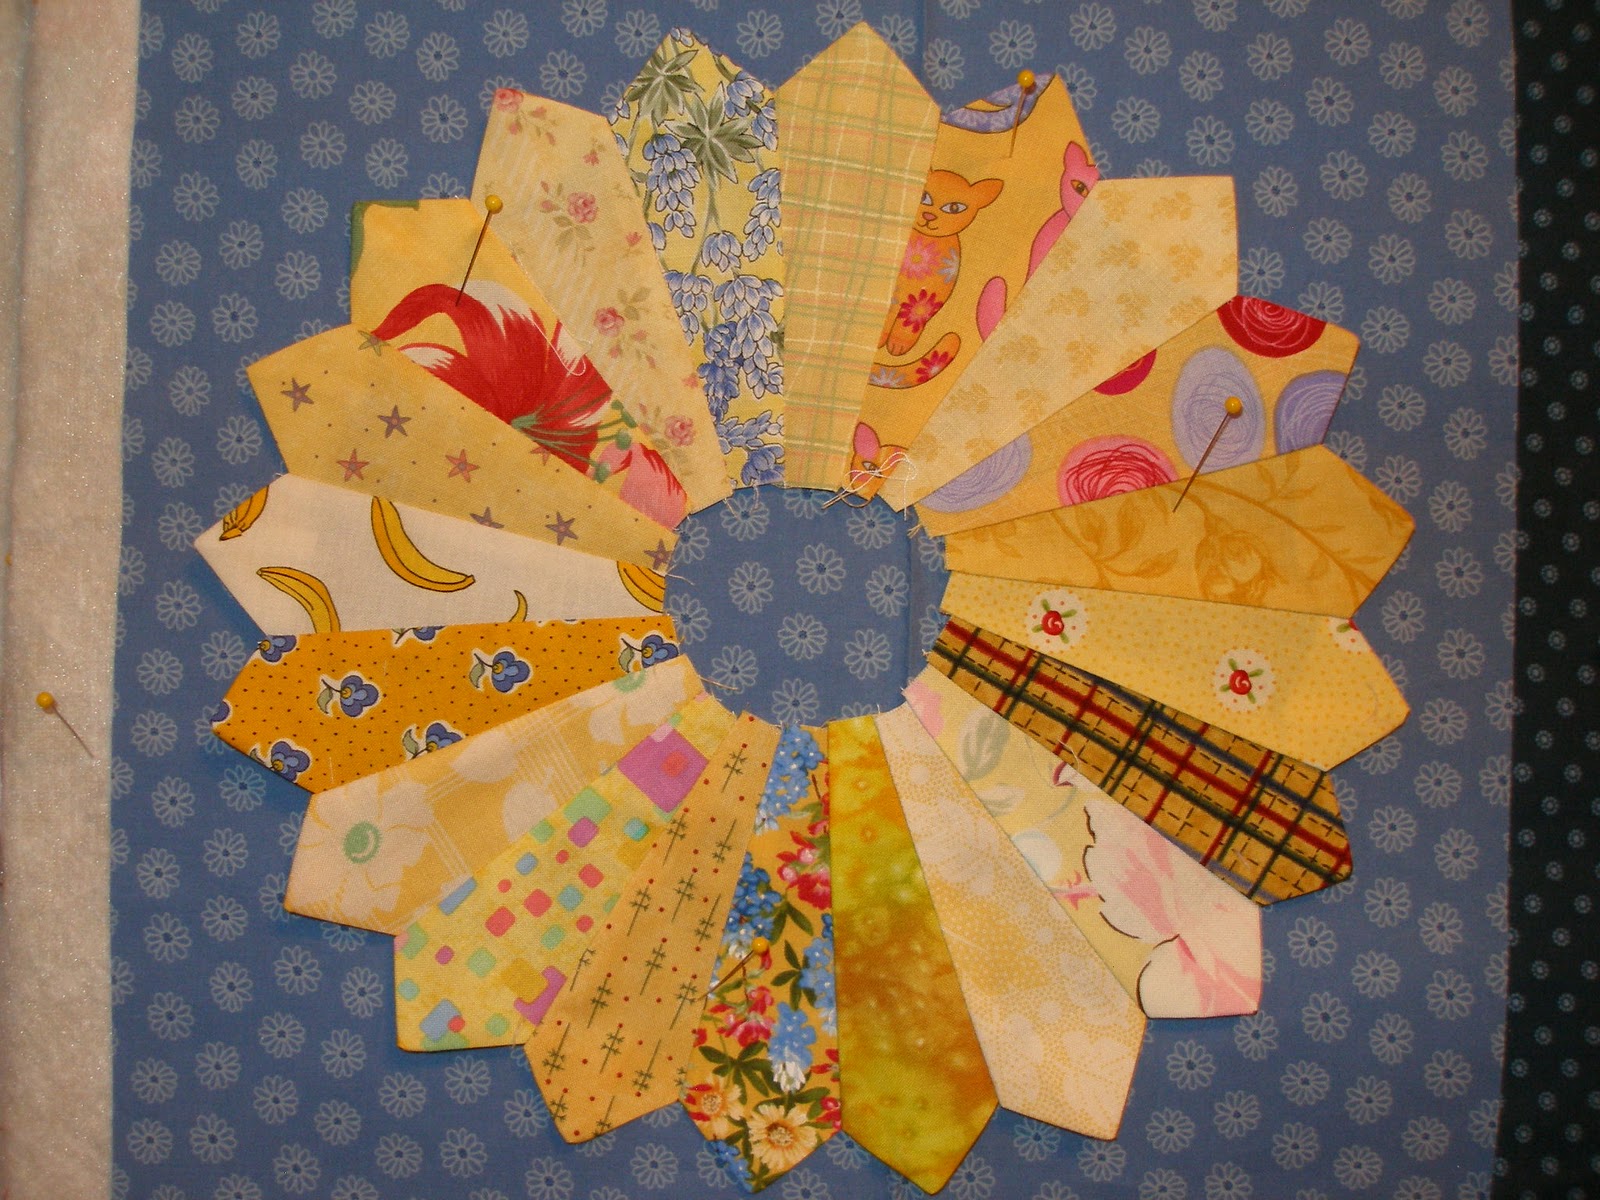

I plan to make 9 plates and make a wall hanging for my kitchen. These colors will match perfectly

When I finish it, I will post a picture!
It is NOT a difficult pattern to do at all. It helps to have a Dresden ruler to cut the blades out.
Thursday, November 10, 2011
a new grandson!
Our son and his wife had a baby boy at one minute after midnight.,.baby's birthday, 11/11/11...
He weighed 8 pounds, 4 oz, lots of black hair, looks like his big brother, Alden. mom and baby are ok!
I will post pictures when we get some! We are so thankful that mom and baby are doing well. ....(20 hours of labor) my DIL is a sweetheart. she did it!
I just got this pic of the new baby. Ephriam Joseph! Grandbaby number 3..all boys!

I just got this pic of the new baby. Ephriam Joseph! Grandbaby number 3..all boys!
Tuesday, November 8, 2011
Hearts from around the World
I put together the heart blocks from my online quilting bees......I participated in two bees and asked for the same block from both of them. I got all these blocks. I used all but 1 small block and I will put it on the back. This has been a great experience.
I received blocks from: Australia, Colorado, Texas, Canada, New South Whales, Ohio, Michigan, New York, Washington, Missouri, Louisiana, Georgia, Utah, New Zealand and France. I think I listed all of the places.


I received blocks from: Australia, Colorado, Texas, Canada, New South Whales, Ohio, Michigan, New York, Washington, Missouri, Louisiana, Georgia, Utah, New Zealand and France. I think I listed all of the places.


Thursday, November 3, 2011
Bertha is here at last!
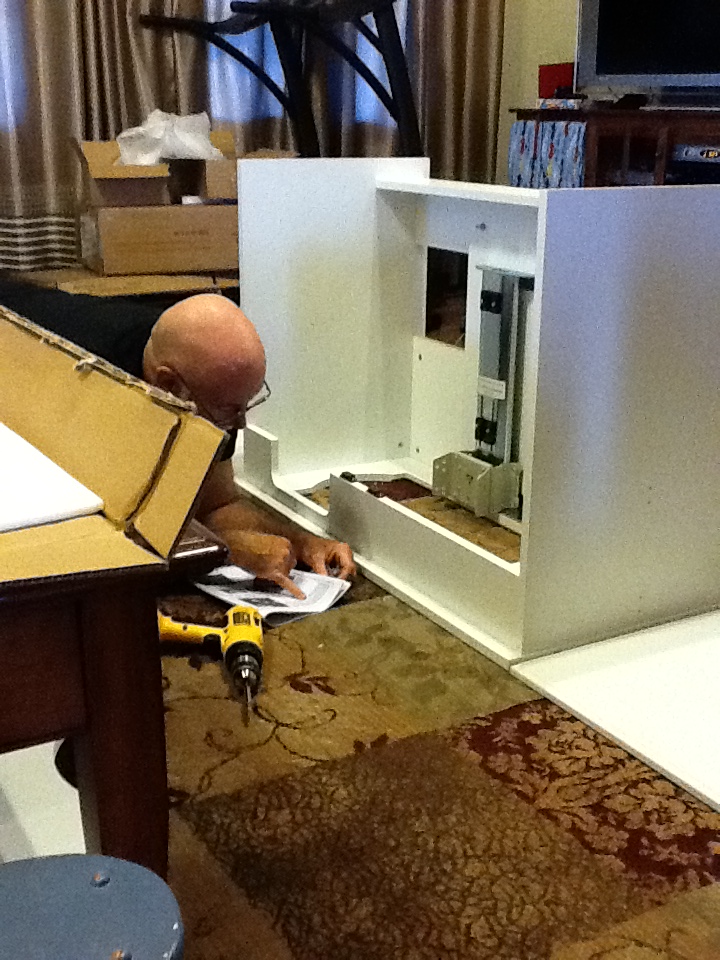
I retired in 2003. I have been sewing on an old desk that was really too high for my shoulders. I think that is part of my shoulder problem. I refused to pay so much for a sewing cabinet back then. I finally found one I really liked and I bit the bullet and bought it. It took my DH all morning to put it together. I helped a little!
Bertha is exactly what I have been wanting all these years!
Here is what it looked like in my living room today.


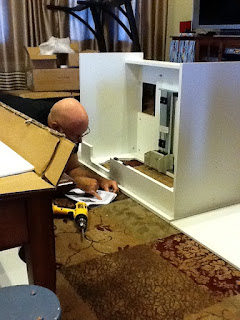


Bertha is exactly what I have been wanting all these years!
Here is what it looked like in my living room today.



And here is 'Bertha' Isn't she lovely? I am so excited to finally have the right cabinet for my machine!

Monday, October 31, 2011
New Sewing cabinet!
I just ordered this sewing cabinet. It is scheduled to be delivered on Friday of this week. I am so happy to finally get a real sewing table instead of just a desk with my machine on it!

It is a Arrow Bertha.
It is a Arrow Bertha.
Lego quilt
I pulled out all the little 1 1/2 inch strips I have been collecting for a few months.. I sewed them end to end and had a strip about 95 yards long. I then sewed the strip together side by side a couple of times. I had a big strip about 8 inches wide. I cut them into 7 1/2 inch squares. I ended up with 43 blocks. I started putting them on my planning board. It is as high as I can reach but I plan to add 2 more rows. I measured it and looks like it will be about 50" x 43" when I sew them all together. I had planned to make a full size quilt but I think I like it as a throw instead. Not sure of a border yet. I will have to see what it looks like all sewn together.


Tuesday, October 25, 2011
It started as a Rail Fence pattern ! ! !
I was going to make a rail fence lap quilt using earth tones and white jelly roll strips that I have had in my fabric stash for quite a while.


I made the strips using 2 dark and a white strip. It looked so boring. I just could not make it as a rail fence so I cut them into squares and put them right side together making sure the lines were perpendicular. I sewed all around the square and cut it into 4 triangles and pressed them open. This is what I ended up with.

It made an unusual block. I sewed them all together and ended up with this!

I used the extra strips to make the border. I think it looks pretty good.
It is about 45" x 43".
Saturday, October 22, 2011
The apple did not fall far from the tree...
I found this picture of the boys and my friends daughter. They must have been about 10, 9 , and 8 years old. They are 36, 35 and 34 now. The second picture is one of my grand son taken a few months ago. Can you pick out his dad in the first picture! it is amazing how much alike my grandsons are like their dads!

 I loved the years we were raising our sons. We have lots of great fun memories. We are now making memories with their children. Life is good. Thank you God for all of our blessings!


Wednesday, October 19, 2011
Trying something new
I looked at a couple of youtube quilting videos and found a couple that demo "tube" patterns....they are so different.
I tried this one....so neat, you can move the little blocks in many different patterns.
this is just on my planning wall for now. I need to make some more little blocks to add to it.
looks like weaving to me!

I tried this one....so neat, you can move the little blocks in many different patterns.
this is just on my planning wall for now. I need to make some more little blocks to add to it.
looks like weaving to me!

i enjoy trying new methods of making blocks
I am thinking of using just one color with the white fabric and see if it looks more like a weave. this is fun! If you try it let me know how you did!
Tuesday, October 18, 2011
Finished a new quilt top today!
I tried a different technique and came out with this quilt top. I think I like it.
I plan to quilt it next week.

I plan to quilt it next week.

Tuesday, October 11, 2011
Around the World my first try!
I have been looking at this pattern online for a while now. Just could not figure out how to make it. It looked impossible to get all those colors in the right places. My aunt tried to explain it to me once but it did not make sense....sew strips, make a tube, cut into circles...???? duh! ..I finally decided to look it up on line and found a few tutorials for it. This is what I have done on it so far. I still have to sew all the strips together. I had this jelly roll of brights and did not know what to do with them. I think I like how it looks.
I plan to put a 2 1/2 inch white border all around to make the white into a complete trip... I am not sure about the other borders that it will need.
I am going to try making one with wider strips.

I plan to put a 2 1/2 inch white border all around to make the white into a complete trip... I am not sure about the other borders that it will need.
I am going to try making one with wider strips.

Subscribe to:
Posts (Atom)